

First of all, you can see the following two camcorder user’s questions:
1. How to transfer video from my canon camcorder to PC?
I have very little computer skill and I would like to be able to transfer video from my canon xa10 to my PC, then edit these videos with premiere for bruning to DVD, what do I need?
2. How do I transfer video from camcorder to a Mac?
I have a Panasonic HC-X900 camcorder. How do I transfer the video from my camera to my MacBook Pro?
After reading, does it found similar problems are bothering you you?
Camcorder does not only captures videos, but the excited moments and memories that treasured for a life time. Maybe you have taken all of this great camcorder footage of your wife, your kids, your dogs, your Harley Davidson and your party etc… In order to make the most of your video, you want to somehow get this footage on to your PC/Mac or even convert camcorder video to DVD. This article not only shows you how to transfer camcorder video to computer, but also tells you a great way to convert camcorder video to DVD. After that is done, with the correct windows or mac video editing software, you can edit your videos on computer like a professional, or just watch them on TV with family and friends, or you can upload and sharing these camdorder videos to Youtube, Video, Facebook etc.
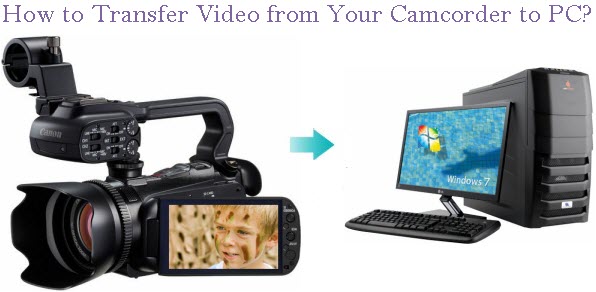
- Part 1. How to Transfer Video from Camcorder to PC?
- Part 2. How to Transfer Video from Camcorder to Mac?
- Part 3. How to convert Camcorder videos to DVD?
- Part 4. How to upload Camcorder videos to YouTube, Vimeo?
Part 1. How to Transfer Video from Camcorder to PC?
1. Install a video capture device
Once you have your device installed, you will be informed what cables to hook up from your camcorder or VHS to the device before transferring the camcorder videos.
2. Run video capture software.
Now that you have your capture equipment installed, and connected your camcorder or video source to the capture device. Your device should have come with video capturing software. So run this software. Once inside you might have to tell it what device you are going to use for the video source. If all went well during the installation of the hardware then in the setup properties for the software you should be able to locate the source capture device. Select it and then continue.
3. Transfer camcorder video to computer
Now most of these software packages once connected to the capture device have a capture page this is where you are going to, YEP you guessed it CAPTURE the video. You can normally leave the rest of the capture settings default unless you have some special needs on the format you wish to save the video as. Click on the capture option of your software and press the play button if necessary on your camcorder or video source. The software will now begin to capture your video and save it to your computer.
Part 2. How to Transfer Video from Camcorder to Mac?
![]()
Connecting a camcorder to a Mac is not very complicated and is not so different than connecting it to a PC, but you must make sure to be informed on how it connection works and how to follow the right steps before actually connecting them.
1. Make sure your camcorder is set to the correct mode for importing photos and videos.
2. Locate the four-pin FireWire port on your video camcorder.
On most video camcorders, you’ll find it located under a plastic or rubber boot. Leave the video camcorder powered off and simply lift up the boot from the camcorder and insert the smaller four-pin end of the FireWire cable into the FireWire port of the camcorder.
3. Insert the other end of the FireWire cable to Mac.
Insert the other end of the FireWire cable, the larger six pin end, into the FireWire port of your Mac. When both of the cables are connected, you can turn on the power to your video camcorder.
4. Transfer video from camcorder to Mac.
Your Mac should automatically launch iMovie in a few seconds. Follow the on-screen instructions on your Mac and begin the video transfer from your video camcorder to your Mac.
Now I believe you can transfer video from you camcorder easily to both your PC and Mac.
Part 3. How to convert Camcorder videos to DVD on Windows or Mac?
If would like to edit and convert camcorder videos to DVD for better saving, please keep reading:
What you need is a DVD burner. Here I strongly recommend Pavtube DVD Creator, which can not only support burning various camcorders like Canon, Panasonic, Sony, JVC, etc video to DVD, but also allow you burn any kind of video sources (MKV, AVI, MP4, WMV, MOV, MTS, TiVo, etc) to DVD. With it, you can make editing, like cropping, trimming, customizing DVD menu, adjusting video and transition effects to your camcorder videos. Photos can be made into slide show DVD simply with a few clicks. In addition, the Quick Burn feature enables users to burn archived ISO image and DVD-Video structure instantly.
Detailed steps refer to:
- How to burn huge MTS files to DVD
- Burn Panasonic AVCHD (Lite) MTS to DVD
- Burn Canon EOS MOV to DVD
- Best way to burn huge TiVo video to DVD disc
- How to rip and burn a Blu-ray Disc to DVD
What’s more, it has also a Mac version: DVD Creator for Mac. So if you are a Mac user, and had just transferred your camcorder video to your Mac, you can download Pavtube Mac DVD Creator software and to burn your camcorder videos to DVD on Mac.
Detailed steps refer to:
- How to convert and burn AVCHD(.mts) to playable DVD on Mac
- Free Burn AVI, MKV, MP4 to DVD on Mac
- Quick burn DVD folder to DVD on Mac
- Burn YouTube videos/Vimeo/Torrent movies to DVD on Mac
- How to burn Final Cut Pro projects to DVD on Mac
Part 4. How to upload Camcorder videos to YouTube, Vimeo?
Do you like to cover all kinds of homemade video footage, such as weddings, birthdays, graduation ceremonies, children growing up etc and then upload these AVCHD, MXF, AVI, etc. videos to YouTube for sharing with friends or others? But while uploading you will meet the problem: YouTube doesn’t support these videos. YouTube gets format limitation, it only accepts files in format of FLV, MOV, MP4 etc. But, don’t worry! We can use third party software, such as Media Magician (Mac) to convert AVCHD, MXF, AVI, Tivo, MTS video to YouTube friendly video formats at first, and then upload the converted video to YouTube directly for share.
Detailed steps refer to:
- Join/edit/split videos frame by frame for uploading to YouTube
- Free Convert MTS shootings for uploading to YouTube/Vimeo on Mac


3 pings
Handbags
April 8, 2013 at 2:21 pm (UTC 0) Link to this comment
Hi,this is a good place,I like this blog very much,thanks!…
Nike
April 9, 2013 at 1:06 am (UTC 0) Link to this comment
hello the post is very good ,I like it!…
Cheer
April 16, 2013 at 11:23 pm (UTC 0) Link to this comment
Hey, thanks for the blog article.Really looking forward to read more. Will read on……