

Most of the latest camcorders, especially Canon, Sony, Panasonic camcorders that record to either SD, SDHC, or Hard-Drive media, are encoded in AVCHD format.
Suppose you bought a new Sony HDR which is sweet and easy to use. And also it can produce high quality videos. But what may make you frustrated is that you are not clear what software can do some simple Frame Accurate editing to AVCHD MTS/M2TS files.
AVCHD is an acronym for Advanced Video Coding High Definition. It’s a file format for recording and playback of HD video. It is typically stored on flash memory card or hard drives. It is great for recording footage from the camera, but it can be a challenge for editing.
MTS/M2TS files are mostly seen in AVCHD camcorders, which is a High-definition MPEG Transport Stream video format, commonly called “AVCHD;” used by Sony, Panasonic, and other HD camcorders. MTS files are essential for those who want to edit videos, especially for camcorder users, who regularly record videos, edit videos and share videos. But MTS/M2TS is rarely supported by most video playing and editing software.
You surely hope you can find one software which can edit the MTS/M2TS video files without any loss of video quality.
Until recently, many of the costumer versions of editing software applications did not support AVCHD MTS/M2TS, but now there are a few that are starting to support it and can import AVCHD files directly from popular camcorders. Some can even open and edit AVCHD MTS/M2TS files already copied to a hard disk.
The root of the problem is the MTS/M2TS File format within AVCHD. This is the raw file produced by most of these SONY AVCHD Camcorders. Not many programs can handle its complex nature and MTS/M2TS looks bad when converted to other formats. Many editing programs even don’t support the AVCHD technology.
Fortunately there is an professional video tool– Pavtube MTS/M2TS Converter / Mac Version(top review)allowing to perform simple tasks and edit AVCHD MTS/M2TS with NLEs natively. It makes it easy and enjoyable to produce one nice AVCHD MTS/M2TS videos editable for FCP, Avid and Premiere, etc.
The thing you should make clear is that every editor has it’s best compatible format or codec, for Adobe Premiere, the best compatible format or codec is MPEG-2, for Final Cut Pro, the best compatible format or codec is Apple ProRes(Apple ProRes Codec Types), for Avid, the best compatible format or codec is Avid DNxHD(*.mov).
There if you make the video you recorded into the best compatible format or codec for the editor you have chosen, the edit job will be easier or more smoothly.


Key Features of Pavtube MTS/M2TS Converter.
- Convert almost all HD/SD audio/video formats: All types of audios and videos (e.g. SD/HD/Tivo/DRV/Camcorder HD footages, etc) to almost any audio and video formats.
- hange default settings: You can change the parameters such as video size, bitrate, frame rate, and channels for your video file according to your need to get the best output effect.
- Batch conversion: Handle multiple videos and realize batch conversion to save your time and energy.
- Merging & splitting: Merge several video clips into one bigger file and splitting one video file into several clips according to the clip quantity, duration time and file size.
- Create new output format: Adjust profile parameters, rename and save it for future use.
- Supported OS: Windows XP/2003/Vista/Windows 7/Windows 8/Windows 8.1/Windows 10
- Supported OS: Mac OS X 10.11 El Capitan, Mac OS X 10.10 Yosemite, 10.9 Mavericks, 10.8 Mountain Lion, 10.7 Lion, 10.6 Snow Leopard, 10.5 Leopard
How to Make Eidting AVCHD More Smoothly?
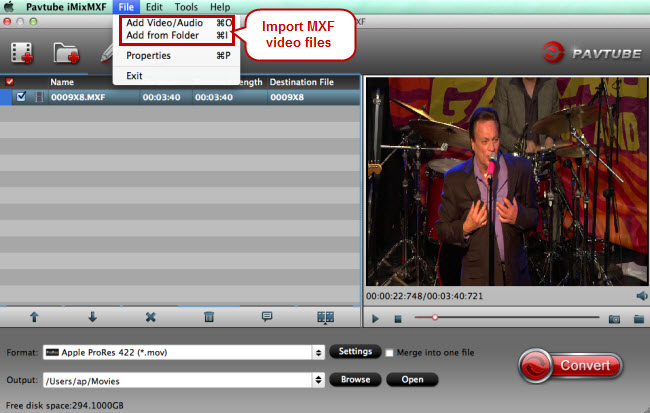
First free download and install Pavtube Video Converter on your Mac or Windows, and then launch it. Now just follow the step by step guide to make editing AVCHD more smoothly.
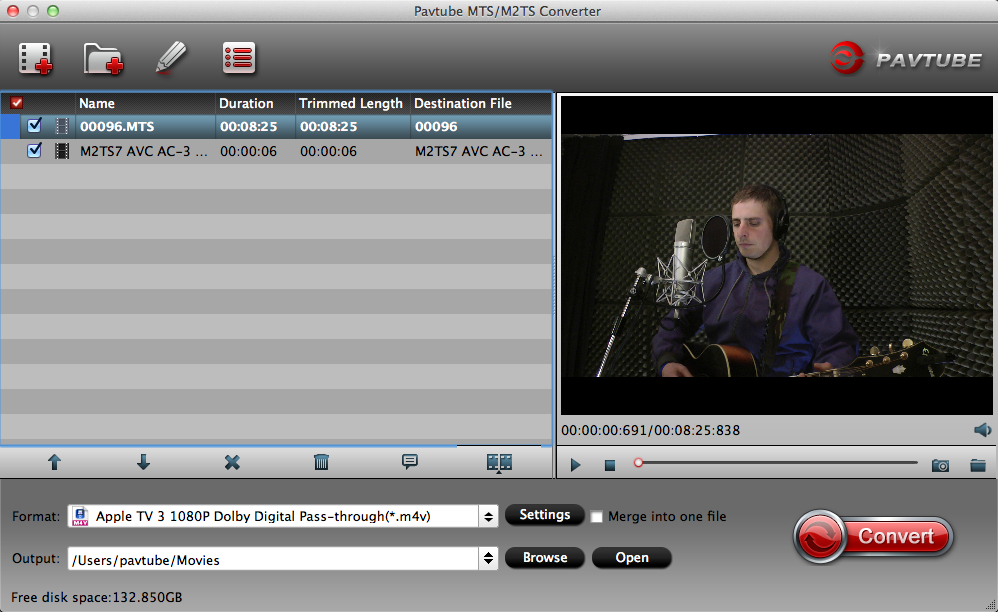
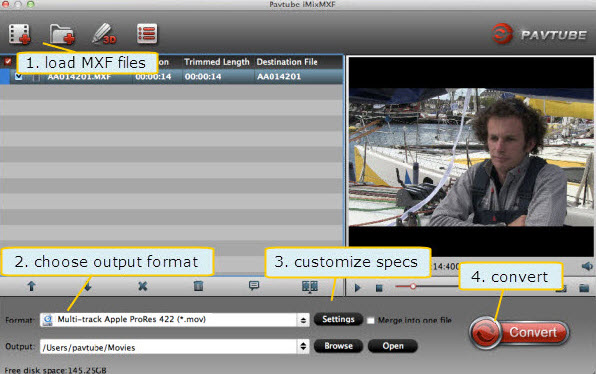
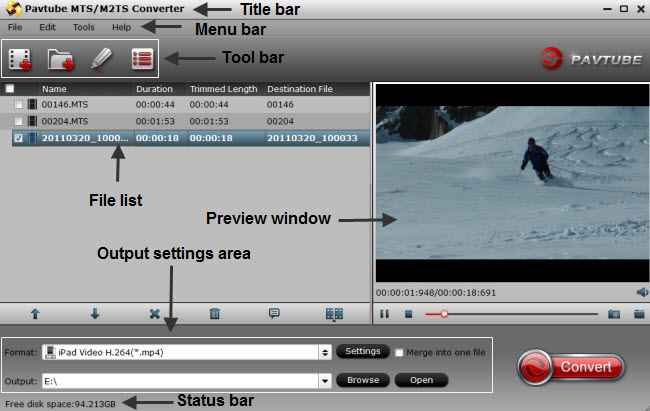
Step 1: Install and launch this program. Just drag and drop video files to the main interface of the program to add videos. If you have several video files that you want to convert in batch, just drag the folder where the sources are to the software.

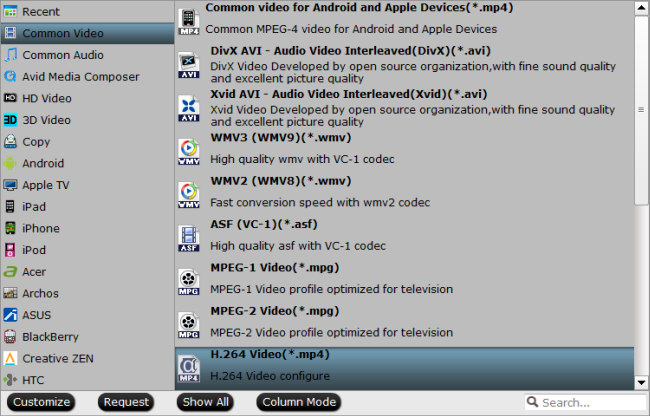
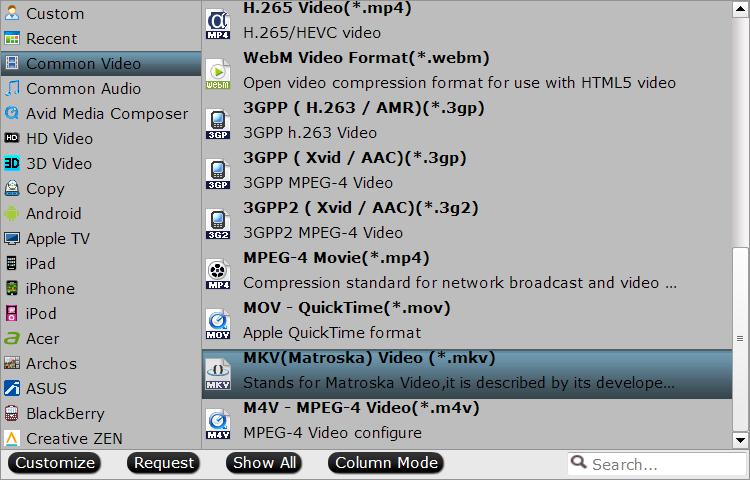
Step 2: Click the “Format” drop-down menu to choose an output format that you prefer.
From “Format” drop-down lists, you can select Avid Media Composer preferable editing codec from “Avid Media Composer” > “Avid DNxHD(*.mov)” as the output format.

Click “Format” bar, from its drop-down options, move your mouse to “Final Cut Pro > Apple ProRes 422 (*.mov)” to select it as the output file format.

From the “Format” drop-down list, go to select “Adobe Premiere Pro/Sony V…” >”MPEG-2″ as the most suitable output format for Adobe Premiere Pro.

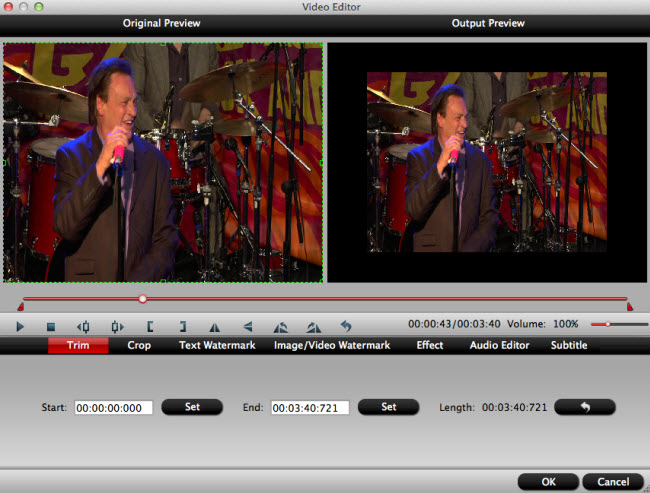
Step 3: Before converting, you can edit the Canon footage to achieve a better overall effect. Simply highlight a video clip and click the “Edit” button beside it to enter the Video Edit window. You can then crop, trim, rotate videos, adjust Canon recordings effects, add text/image watermarks, etc. as you like.
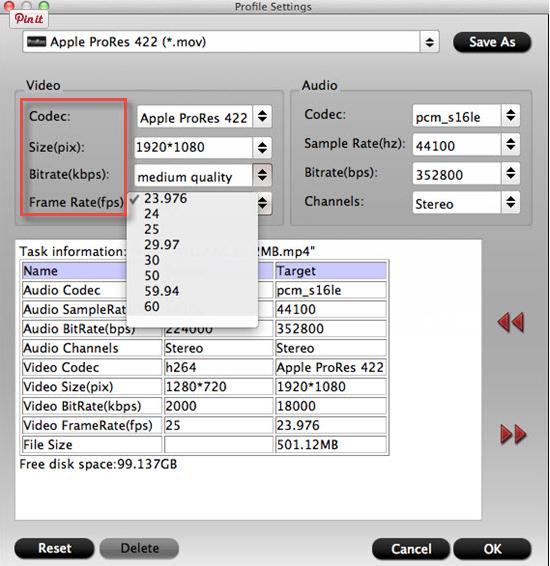
Or you can open “Profile Settings” window to adjust the output video codec, size, bit rate, frame rate, audio codec, sample rate, bit rate and channels. Here i just give a Apple ProRes as the example, others for Avid and Premiere are nearly the same.
Step 4: Hit the convert button under the preview windows, the conversion will started immediately.
When the conversion is completed, run the editor and import the converted footage with more smoothly editing.
Read More:
- FCP does not read your broken AVCHD structure properly
- AVCHD VS MP4: Quality and File Size of AVCHD over MP4
- Get AVCHD MTS Workflow with DaVinci Resolve (Lite)
- Import AVCHD MTS/M2TS to iPhoto 8/9/11
- Does Pinnacle Studio 17 Support AVCHD MTS Files?


Recent Comments