

For Mac users, it’s hard to find an easier way to bring your moving images together into one professional looking production than the built-in video editor iMovie. I’ve been working with iMovie for a while and thought it great till I got stuck importing some AVI videos- iMovie simply would not recognize them. Later I found the real big problem, that my MTS shootings taken with a Sony AVCHD camcorder grey out when I tried to bring them for editing.
Is there an easy-to-use free video editor for Mac that works with any video? I did long time Google search and spent a few hours trying out the top picks, yet none works to my satisfactory. Some do not deal my AVCHD footage, others are not so intuitive to use. Then I got this Pavtube Media Magician for Mac, which is brilliant! I would definitely recommend this app to anyone who is seeking for an iMovie alternative.
Why I like it? It edits everything – AVCHD footage, MXF, AVI, MKV, flashes, MPEG, VOB videos copied from DVD, and even my TiVo shows! And the interface is sooo easy to get started. You just import a video to the app, then drag it to the timeline where you start editing. The control buttons on timeline help you locate frames accurately so that you can cut, trim, delete, and merge video clips in a much easier way.
The following passages are some guidance quoted from its help page How to split/cut/trim MTS in frame accurate editor:
Control buttons on Timeline of Media Magician for Mac:

1. Time Display Controller: Move your mouse cursor on timeline, the opposite time point will be displayed here. Once you entered a time point into the time display box and click enter, the Preview Window and Timeline will switch to the frame of this time point. This helps to locate to the accurate frame that you want.??
2. Zoom in and Zoom out: Drag the bar on top-right of timeline to Zoom in or out for better view.
3. Preview: Highlight a clip on timeline and click Play button, you can preview. Double click on a clip can also begin preview.
4.Trim: Put your cursor to the start or end point of a clip on timeline until it changes to trimmer. Drag the trimmer and you can trim off unwanted starting or ending.
5. Cut: Drag the pointer to the right place; Put your cursor to process bar under preview window and select the right frame; Click the Scissors button and you can cut the clip. And then you can rearrange order or delete.
6. Delete: Highlight the unwanted clip on timeline, and click Delete button. You can also delete it with right-click menu.
7. Rearrange order: Drag and hold a clip to the right place until the place line shows. Drop the clip and it will be placed right there.
8. Merge & join: All files placed on timeline will be output as one file. So if you want to merge and join several clips, just drag them to timeline in right order.
On the preview window, you can use Frame Selection Controller to seek to the corresponding frame of the current image, or seek the previous frame/next frame, which helps to locate frames accurately.

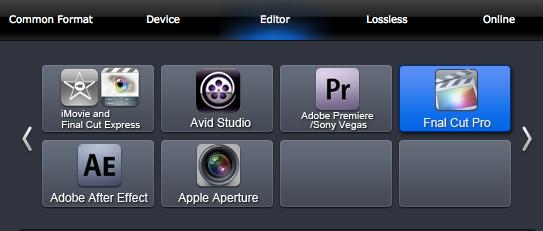
In general, Pavtube Media Magician for Mac offers an easy introduction to video editing with support for color adjustment, themes, easy to use effects, a simplistic timeline view and built-in camcorder wizard for AVCHD ingesting. It will leave you hungry for more if you’re more used to work with iMovie (like me) or after a powerful video editing solution, but thanks god this smart app even exports intermediate codecs! I really like that I can export MOV in Apple Intermediate codec that is natively supported by iMovie –this avoid rendering and lags in video editing. Also, professionals can export ProRes and DNxHD for further post-production in FCP, Avid, Adobe AE, etc.


Recent Comments