

06-01 Sequence/Timeline markers (like FCP7).
You can have Sequence markers for the entire timeline by placing them in a clip the length of your timeline. Here I’ve placed markers in a slug in a storyline. I use a slug because a slug is transparent in an upper storyline in FCPX. You can use any clip to hold your timeline master markers if you disable it. Even a disabled title clip will work. To add markers, move your skimmer in the master marker storyline clip where you want the marker to be and hit the M key. Once markers are added you can jump to any timeline marker location by clicking on the marker in the timeline index.
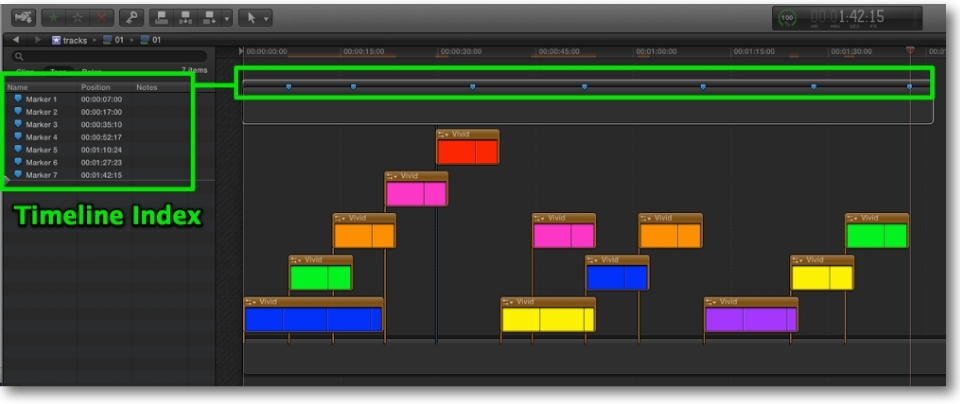
To “Delete All Markers” just delete the markers storyline. You can also “Delete Selected Markers” by selecting all Timeline clips and visiting the menu Mark > Markers > Delete Markers in Selection or use the keyboard selection Ctrl – Shift – M.
06-02 Highlight with a Shape Mask.
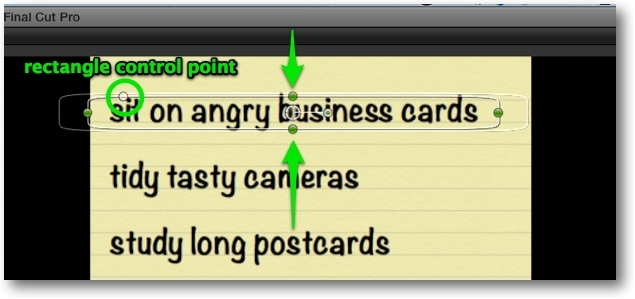
Shape Masks are actually two masks in one, inside the mask and outside the mask. Here I’m using a jpg with text for highlighting In my timeline. Select your clip in the timeline and in the video tab of the Inspector click the add Shape Mask button. This will add a default circle Shape Mask. Change the Shape Mask into a rectangle by dragging the rectangle control point to the left. The outer circle controls the feathering of the Mask Shape.

Move the Mask Shape by dragging on its center move handle to the area that you want highlighted. Then change the Shape Mask height by dragging the top and bottom green button controls and its width by dragging the left and right green button controls to size it to fit this first highlight area.
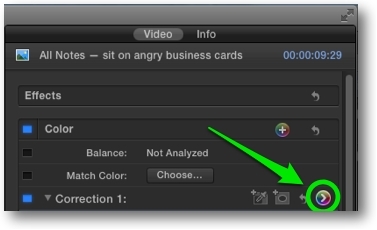
Click the Correction 1 Show Correction right arrow button to go to the Color Adjustment panel.
(1) Click on the Exposure tab. (2) Click the Outside Mask control at the bottom of the panel. (3) Drag the global control down to darken outside of the Shape Mask to achieve the desired highlighting effect as shown below.

06-03 Animate a Highlight with Shape Mask keyframes.
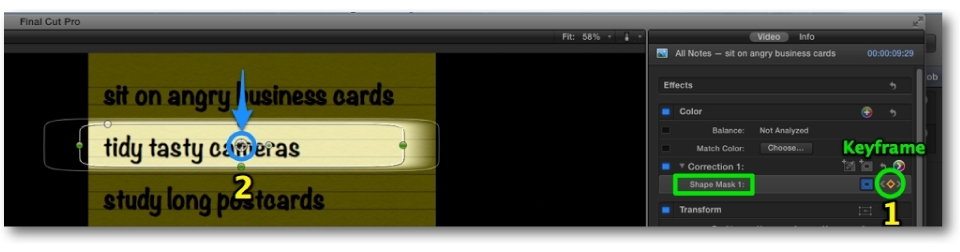
In the inspector, click the Shape Mask 1 keyframe button (1) to set a keyframe at your first highlight position. In the timeline, move the playhead the length of time you want your first area highlighted. In the Inspector, add a second keyframe to lock in this time length.
Move the timeline playhead one second (or other length of time) forward. This will be the highlight travel time from area one to area two. In the Viewer move your Shape Mask by dragging on its center control point (2) to position it over the next highlight area. A new position keyframe will automatically be added to the Shape Mask. Repeat moving the timeline playhead, setting keyframes and adjusting the Shape Mask position for all additional areas that you want highlighted. The highlight will now pause and then move when played back in the timeline.
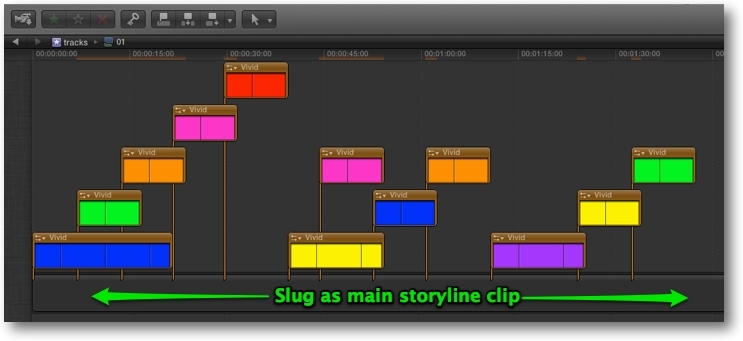
06-04 Use a slug as your main storyline clip for some projects.
If you need the freedom to move attached clips or secondary storylines around without being restricted by what they are attached to, you can use this technique. The attached clips are effectively connected to the entire timeline.
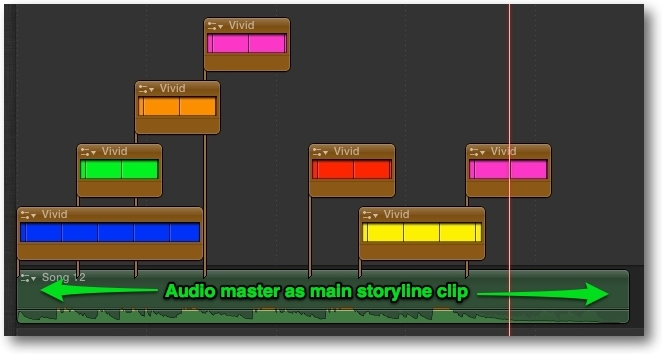
If you are cutting a music video, you could also use your master audio track as your main storyline clip to achieve the same effect.
06-05 1/10th pixel adjustments for position parameters in the Inspector.
Hold down the Option key while dragging up/down on the position values to get 1/10th pixel adjustments. Without the Option key held down, dragging up and down will move the position in whole pixels. To move 10 pixels at a time, hold down the Shift key.
![]()
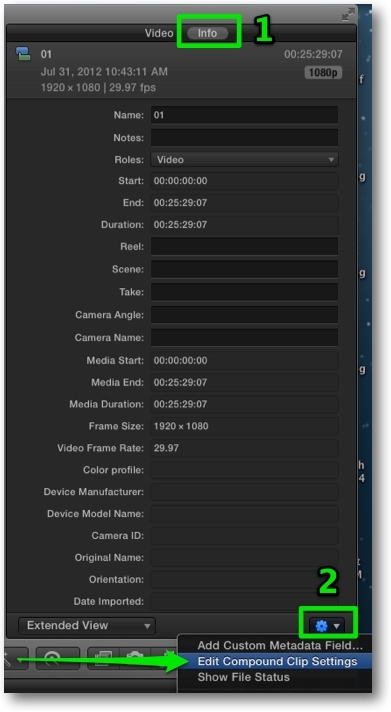
06-06 To edit a Compound clip’s settings.
select the compound clip in the Event browser, go to the info panel of the Inspector (1) and at the bottom of the Info panel click on the little gear icon drop-down menu (2). From the drop-down menu choose Edit Compound Clip Settings.
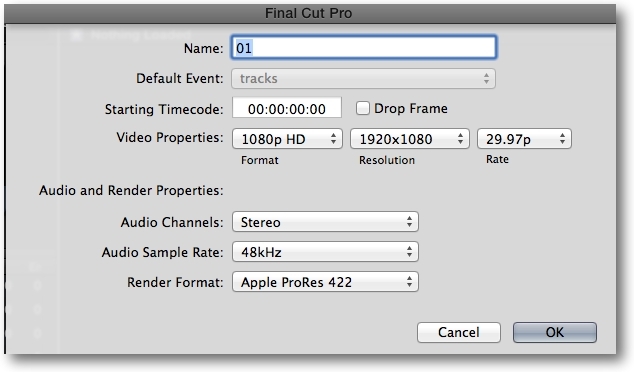
Here you can modify the Name, Starting Timecode, Video Properties, Audio Properties and Render Format of your Compound clip.
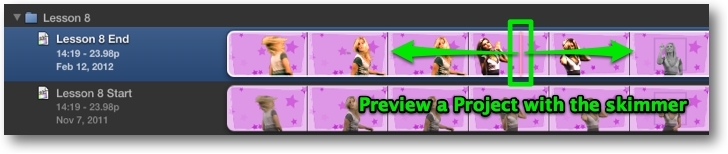
06-07 Preview a Project before opening it.
The skimmer is a great tool for reviewing clips in the Timeline and Event browser but you can also can preview an entire Project complete with edits, transitions, titles, effects and listen to audio before you open it. If you have multiple versions of a Project and want to open a certain one, this is the way to check which one to open. Select your Project in the Project Library and skim your mouse pointer over it for an instant preview. You can also play the Project from the skimmer position by pressing the spacebar. Of course skimming (S key) has to be turned on for this to work.


Recent Comments