Q1:
“I may have a certain idea on this, but would love to have a detailed guidance from experts. all from scratch.
i’ve been asked to shoot a video on Sony PMW EX3 in a couple of weeks’ time.
i’ll have to travel to a different country for that, and on location i will only have access to my intel macbook with Tiger OS X 10.4.11 and Final Cut Pro 6.0
i really need to be well prepared for this.
and here comes the question:
precisely, what software / firmware / updates / codecs would i need on my mac in order to load clips off Sony EX3 onto an external USB drive, attached to my macbook, and be able to preview them in FCP?
thanks for the help in advance.”
Q2:
“I have recorded many 1080p footages from Sony PMW-EX3 camcorder, which I borrowed from my friends. I haven’t shot or edited HD before now, so need some help setting up the project. when I import Sony PMW-EX3 MPEG-2 MP4 files to Final Cut Pro 6.0, it says that the codec are not supported, I searched the forum and many people say the MPEG-2 codec need to be converted to Apple ProRes codec, can you give me some suggestions and what software I need to use?”.
A:Update to at least 6.0.3…that is the first version to deal with the XDCAM EX codec. Then get the Sony Transfer utility. This allows you to view the footage, and then convert it to Apple ProRes.
Instructions
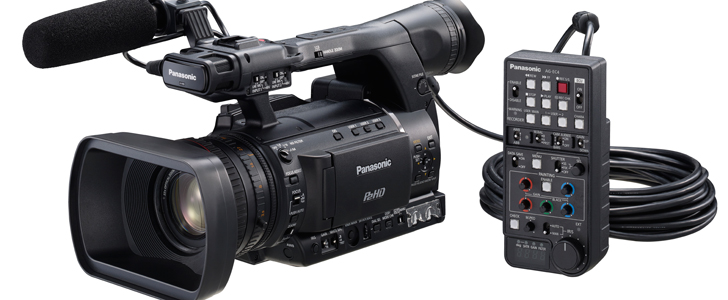
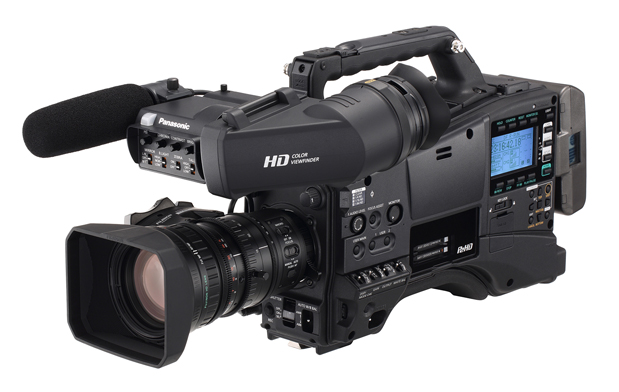
1. Sony PMW-EX3 camcorder is professional camcorder which has excellent video quality, it is great for us to take high quality full HD videos.
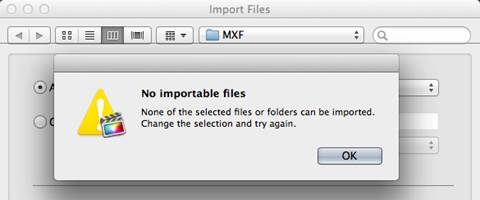
2. Sony XDCAM EX camcorders usually record MPEG-2 codec MP4 format video, this codec is not good for editing in Apple Final Cut Pro, and you will encounter importing and codec problems when you try to import Sony PMW-EX3 recordings to Final Cut Pro.
3. Apple Final Cut Pro best supported video format is Apple ProRes 422 codec MOV format, so the best method to solve Sony PMW-EX3 importing and codec problem is to convert Sony PMW-EX3 MP4 footage to ProRes for editing in Final Cut Pro, you can follow the steps below to transcode Sony PMW-EX3 files to FCP for editing.
4. Something you need to know about Apple ProRes codec
Apple ProRes is a post-production format designed for pristine quality, economical hardware configurations, and high-performance, multistream Final Cut Pro real-time editing – for film, digital cinema, high definition (HD), and standard definition (SD) workflows.
The Apple ProRes format comes in five versions: Apple ProRes 4444, Apple ProRes 422 (HQ), Apple ProRes 422, Apple ProRes 422 (LT), and Apple ProRes 422 (Proxy). As for video quality:
Apple ProRes 4444 has higher quality than Apple ProRes 422 (HQ);
Apple ProRes 422 (HQ) has higher quality than Apple ProRes 422;
Apple ProRes 422 has higher quality than Apple ProRes 422 (LT);
Apple ProRes 422 (LT) has higher quality than Apple ProRes 422 (Proxy)
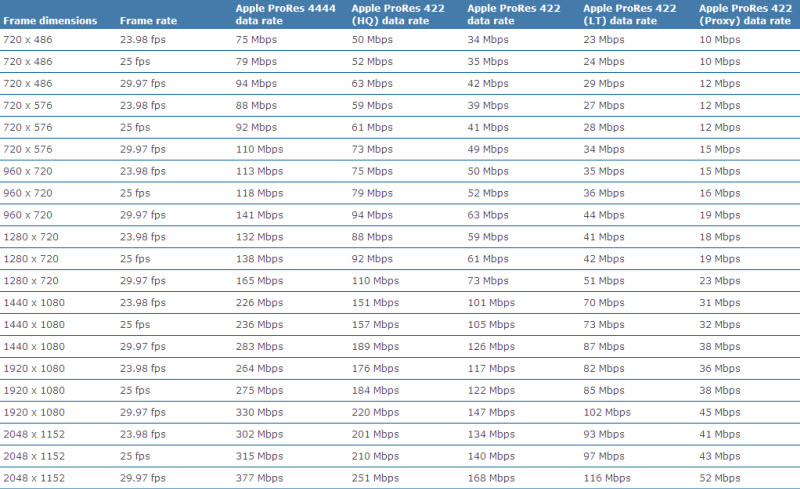
For a complete comparison of the relative data rates of the Apple ProRes codecs, see Apple ProRes Format Specifications.
5. Pavtube HD Video Converter for Mac – a professional HD Video Converter can help you convert Sony PMW-EX3 MP4 files to ProRes 422 MOV format for Final Cut Pro, more import and output formats are also supported. It can also transcode camera videos and TiVo recordings for edit use with iMovie 8/9/11, Final Cut Pro, Final Cut Pro X, Final Cut Express 4, Avid Media Composer and Adobe Premiere Pro, etc on Mac OS X Leopard (10.5), Snow Leopard (10.6), Lion (10.7), Mountain Lion (10.8).
How to Connect Sony PMW-EX3 to your Mac?
1. Download and install the XDCAM Transfer plug-in for Apple Final Cut Pro from the Sony website. This free application adds a special option to Final Cut Pro’s menu for importing XDCAM video.
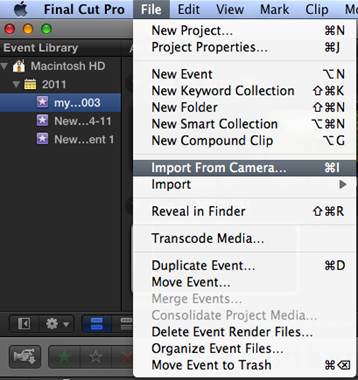
2. Connect the power cable to your EX3 if you do not have a charged battery. Connect the camera’s USB cable to the USB port on the camcorder, which is located next to the other audio and video cable connections. Connect the other end of the USB cable to an available port on your Mac.
3. Move the camcorder’s power switch to the right to set it to “Media.” When the camera displays a message identifying a USB connection, select “Execute” to accept the connection to your computer.
How to Convert Sony PMW-EX3 MPEG-2 MP4 to Apple ProRes 4444 or ProRes 422 for editing on Final Cut Pro (X)?

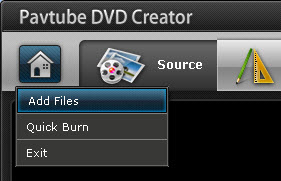
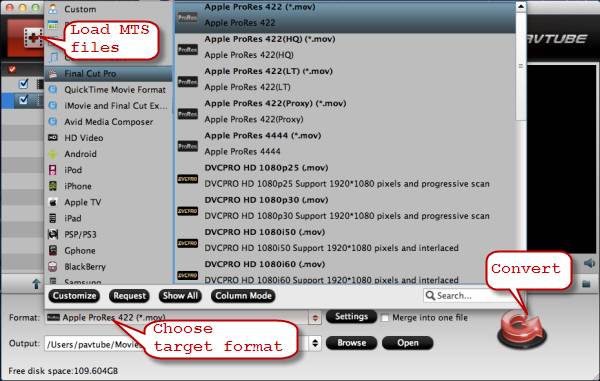
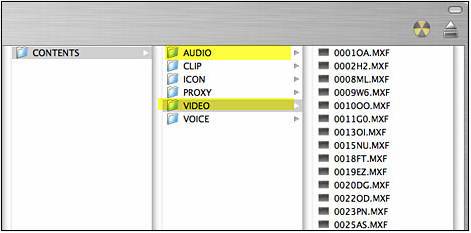
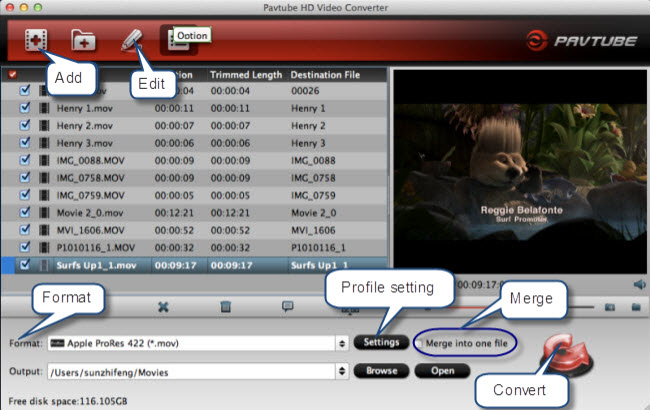
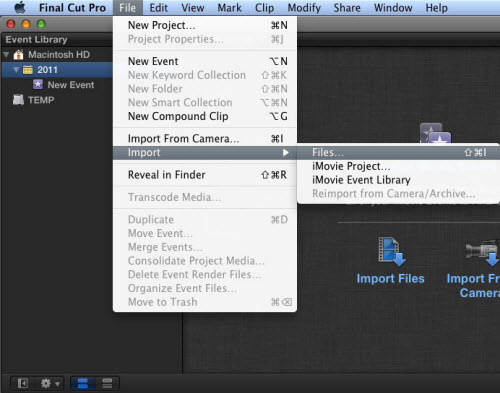
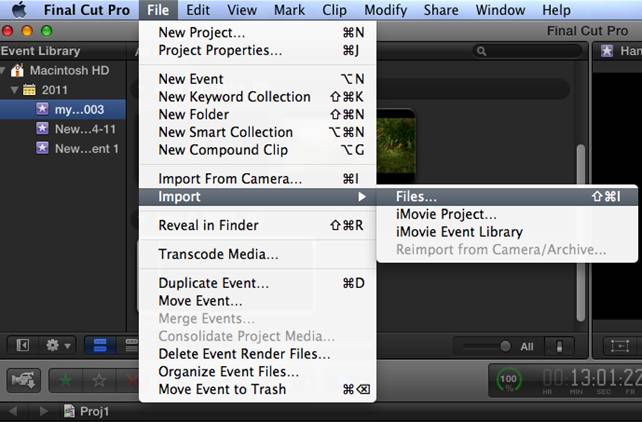
Step 1. Install and launch this Sony XDCAM EX MPEG-2 to FCP Converter. Click the “Add Video” button to load Sony EX3 seperate mp4 files or press on “add from folder” button to add MXF folder.
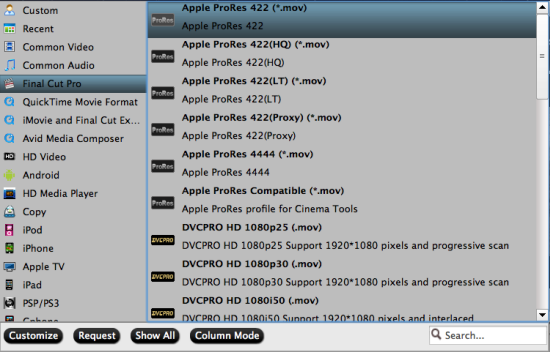
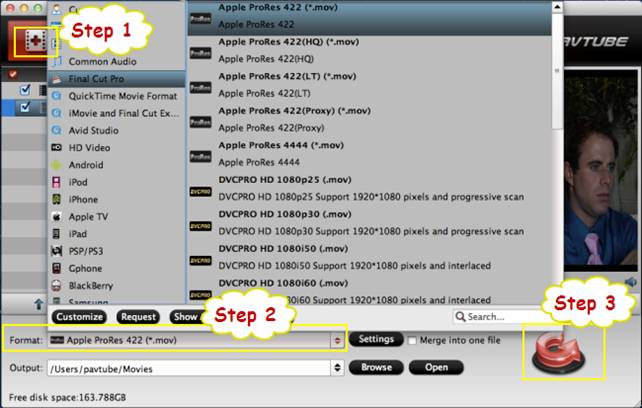
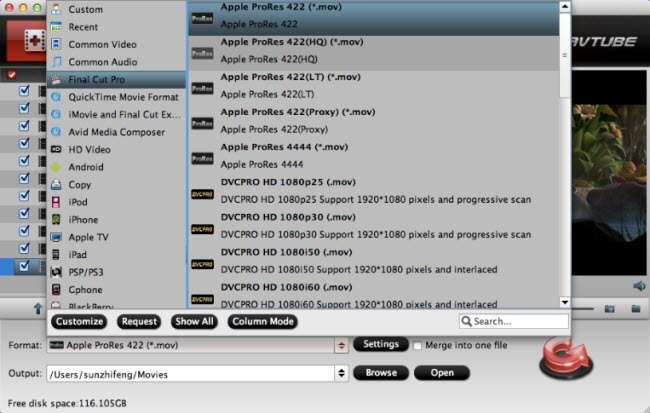
Step 2. Click on the “Format” and you will get a dropdown menu and then select Final Cut Pro > Apple ProRes 4444 (*.mov) as the output format which is the best format for Final Cut Pro.
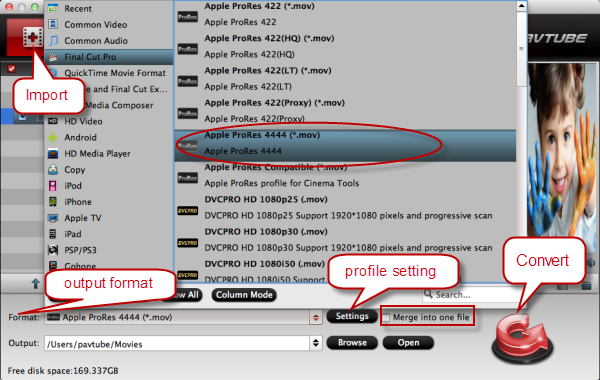
PS: The first five Apple ProRes .mov formats all work with FCP well.
If you want to transfer Sony XDCAM mxf recordings to FCP keeping original HD Quality, you should better shoose “Final Cut Pro” > “Apple ProRes 422(HQ)(*.mov)” video format.
If you want to get a small XDCAM mxf file for editing in FCP (X), you’d better select Apple PreRes 422(LT)(*.mov).
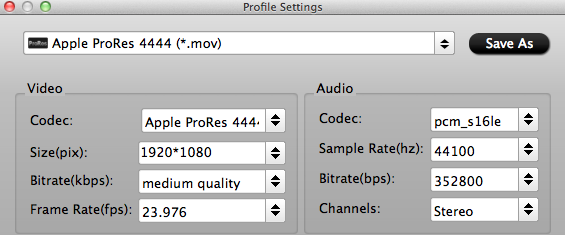
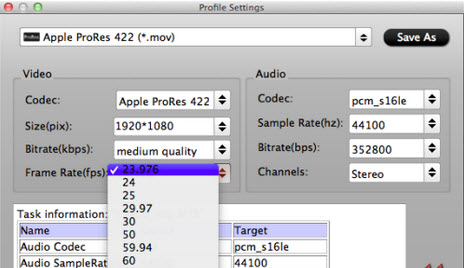
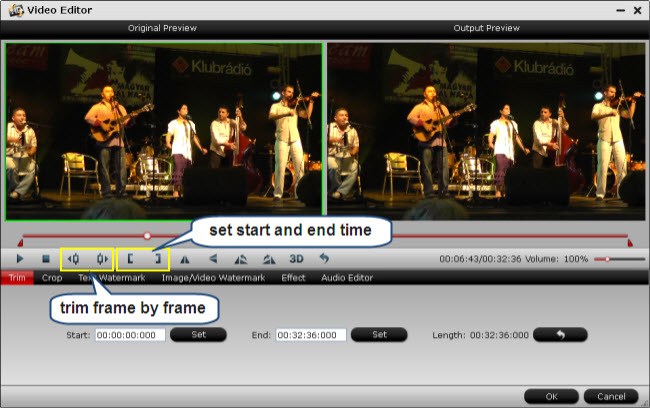
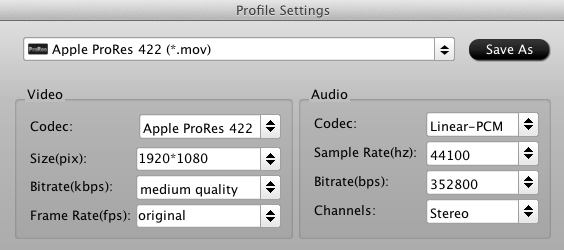
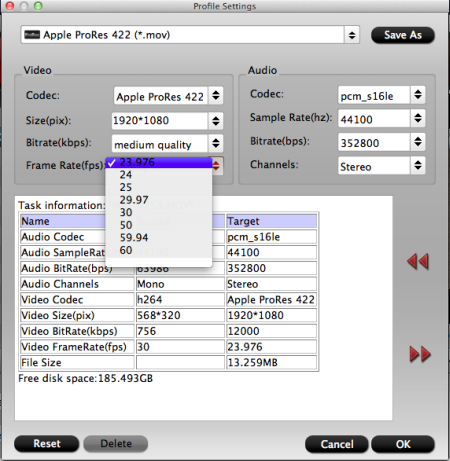
Step 3. Click “Settings” to set video resolution (1920×1080/1440×1080/1280×720/720×480), bitrate(from 1Mbps to 20Mbps), frame rate (24p/30p) as you like. To deinterlace, denoise, mute, volume up and crop MP4 video, click “Edit” menu.
Step 4. Click “Convert” button and this Sony PMW-EX3 MPEG-2 to FCP Converter for Mac OS X 10.8 will start transcode Sony EX3 XDCAM EX MPEG-2 MP4 to ProRes for directly importing to FCP (X).
After fast Sony XDCAM MP4 to FCP (X) Conversion, you can directly Importing video files and projects into Final Cut Pro (X) without problems on Mac OS X 10.8. And please remember for FCP X users, make sure that you have installed the Apple ProRes Codec manually since the FCP (X) asks users to install it by themselves.
Tips:
1. If you want to convert a XDCam EX MP4 file into a mac-compatible file for enjoying which retain the same size and quality, with running xdcam browser you can preview the MP4 files or export as a mxf file, but can’t transfer to a .mov file and this rewapped .mxf file may not be viewing. Also, can try a program called “Calibrated{Q} XD Decode codec” ($89.95) to encode MP4 files for playback. But using Pavtube HD Video Converter for Mac ($35) can helps you to tranfer to a mac friendly format like .mov. easily and fastly.
2. If you have rewapped the MP4 files to MXF by xdcam browser, you can also use Pavtube Mac HD Video Converter above, and if you like, you can try another related software Mac Sony MXF Converter specially designed for MXF files.
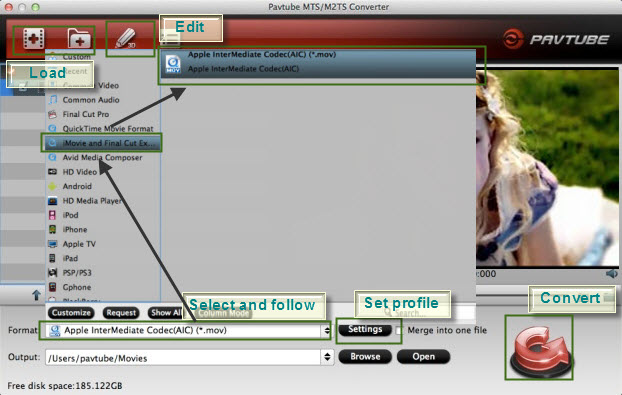
3. If you are iMovie and Final Cut Express users, only need to change Step 2, Click “Format > iMovie and Final Cut Express > Apple Intermediate Codec(AIC) (*.mov)” as output format for iMovie or FCE importing and editing on Mac.

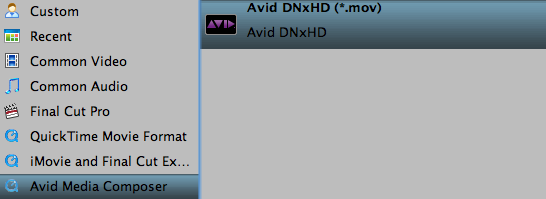
4. If you are Avid Media Composer users, only need to change Step 2, Click “Format > Avid Media Composer > Avid DNxHD (*.mov)” as the best codec for Avid Media Composer editing on Windows or Mac.
Hope the article can help you to import Sony PMW-EX3 XDCAM EX MPEG-2 MP4 clip to FCP (X) for editing on Mac Mountain Lion 10.8.


Recent Comments