

Summary: This article is about how to convert Red One camcorder recorded 4K RAW files to FCP X Apple ProRes codec MOV format, and then enable you to edit Red One 4K RAW videos with FCP X in Apple ProRes 422 or Apple ProRes 4444 codec on Mac El Capitan.
I have video from a RED ONE that was shot in 4.5k. I want to edit it in Final Cut X. How do I properly convert this footage to edit in FCP X so I can revert it back to 4k for coloring in post and not lose resolution in the process. Can anyone give me advice on what will effectively edit 4K (like processor wise and memory wise and graphics card wise., etc?) Maybe the current iMac will do it. I’m not sure. Maybe a low level version of the new Mac Pro will do it, I’m not sure. I’m an artist, not a technician.
Before solved the problem, I would give some information about Red One, and why you guys cannot handle the original 4k video in FCP X.
Two generation Red One
The first Red Ones were outfitted with the 12 megapixel Mysterium sensor, capable of capturing up to 120 frames per second at 2K resolution and 30 frames per second at 4K resolution
The second generation, Red One Mysterium-X has a 14 megapixel Mysterium-X sensor. It captures up to 120 frames per second at 2K resolution and up to 30 frames per second at 4K resolution. With the upgraded sensor, the Red One Mysterium-X offers more dynamic range, higher sensitivity and enhanced color management tools than the Red One Mysterium.
Why you guys cannot handle the original 4k video in FCP X
There are many, many flavors of 4K files, and more to come. RED camera for example can be setup to shoot uncompressed RAW 4K, 3X compression, 5X compression, 8X compression, and 10X compression.
With an iMac, or even with the new Mac Pro, to handle 4K workflows effectively, you would have to add-on a Thunderbolt expansion chassis with a RED Rocket card or RED Rocket X card, at least one or two powerful graphics cards such a the GTX 680 Mac Edition, and a beefy Thunderbolt RAID like a Promise Pegasus 6-drive model. All the costs over $18800 totally.
That is to say, there is unfortunately no way you will be able to edit native 4K files at any of the higher quality, lower compression rates. The only alternative on a Mac would be to transcode to a lighter codec, such as Pro Res. Well…yes, if you convert to ProRes and scale to 2K for editing.
Solution Here
The best solution to edit 4K video on Mac with FCP X is to convert Red One 4K RAW files to Apple ProRes codec.Pavtube HD Video Converter for Mac may help you a lot on this convert part, this is the top 4K video converter on the market, it can convert any 4K videos recorded by Red One camcorder or other Red 4K camcorders, Sony 4K camcorders, Panasonic 4K camcorders, Canon 4K camcorders, JVC 4K camcorders, etc. Why need to convert 4K video on Mac to Apple ProRes codec? Because Apple ProRes codec is the native supported video codec of FCP X, once you convert 4K video on Mac to Apple ProRes 422 or Apple ProRes 4444 codec for FCP X, you will be able to edit Red One 4K videos with Final Cut Pro X smoothly. Now please download the the 4K video converter and follow the steps below to convert Red One 4K RAW files to FCP X Apple ProRes.


Other Download:
– Pavtube old official address: http://www.pavtube.com/hd-video-converter-mac/
– Amazon Store Download: http://www.amazon.com/Pavtube-Video-Converter-Mac-Download/dp/B00QI9GNZS
– AppStore Download: https://itunes.apple.com/de/app/pavtube-hd-video-converter/id502792488?mt=12
– Cnet Download: http://download.cnet.com/Pavtube-HD-Video-Converter/3000-2194_4-76177786.html
How to Downscale the 4K Red One RAW Video to Apple ProRes 422 for Editing in FCP X
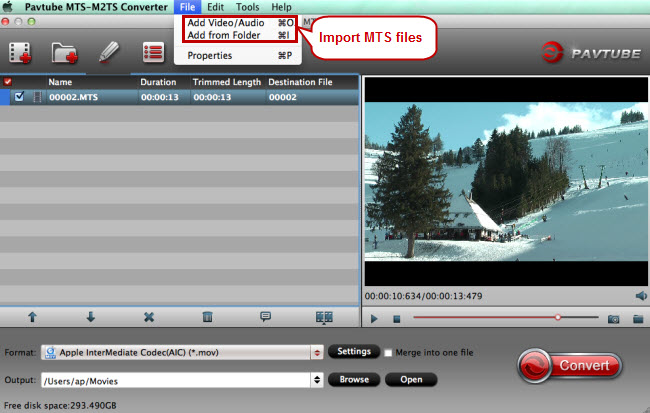
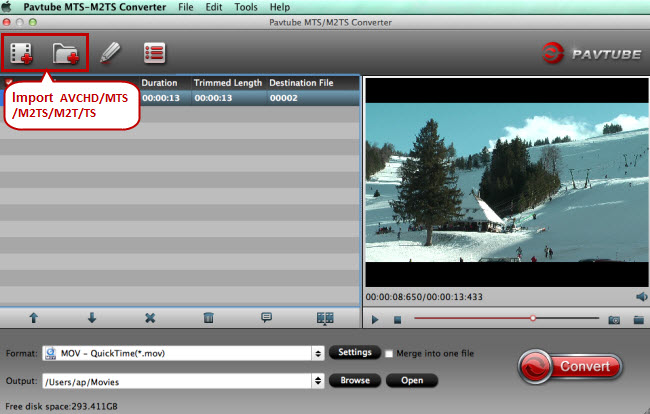
Step 1: Add Red One camcorder recorded 4K RAW files.
Launch the program on your computer, add Red One camcorder recorded 4K RAW files to the program by clicking the “Add Video” or “Add folder” button.

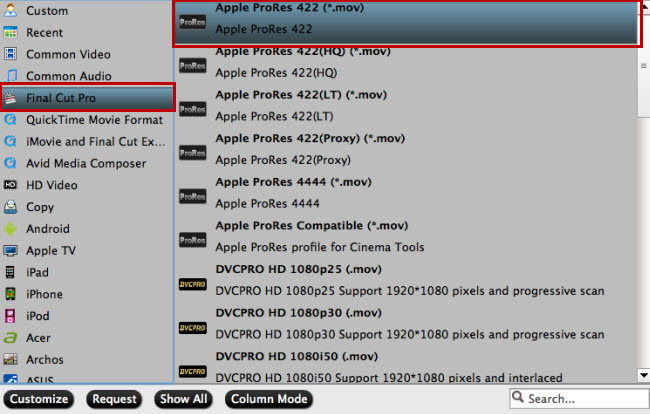
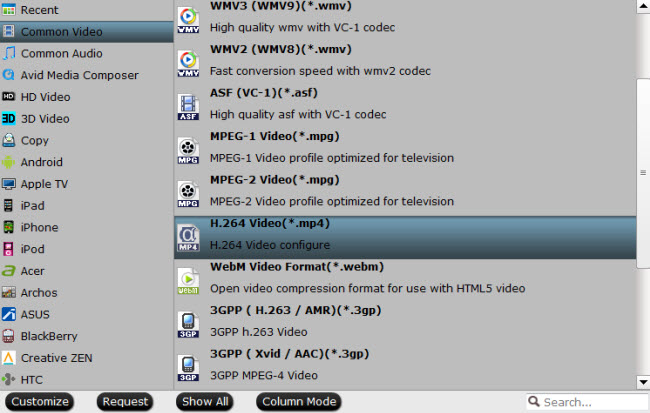
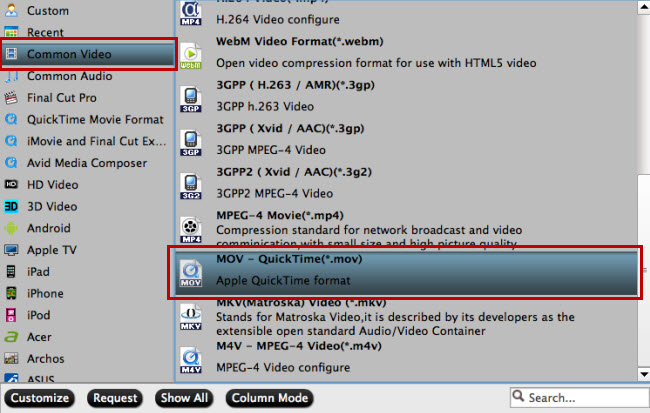
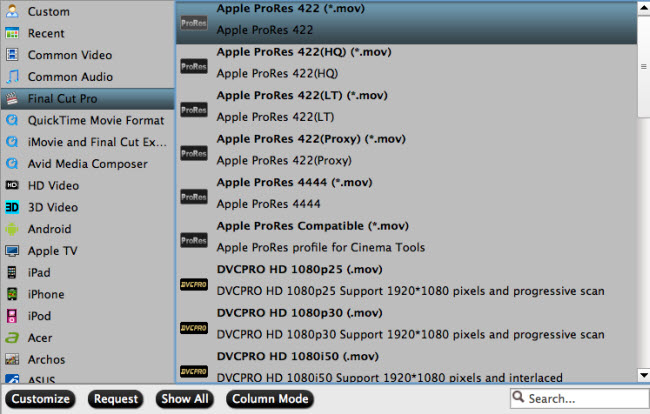
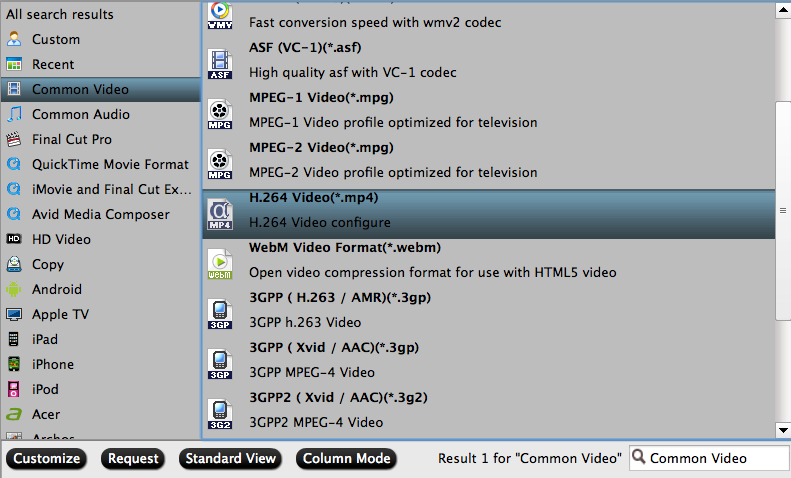
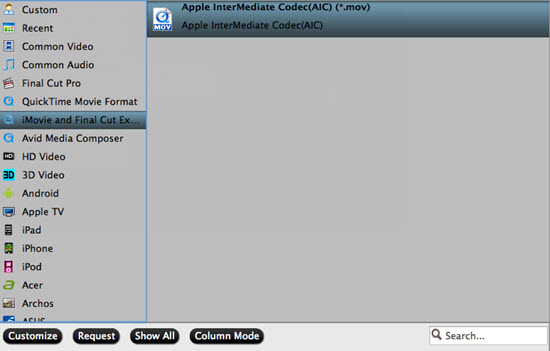
Step 2: Choose output file format.
From “Format” drop-down option, choose the output format according to your own preference, for FCP editing, choose “Final Cut Pro” >”Apple Prores 422(*.mov)” to output.
Tips:
1.When converting video to Final Cut Pro oriented format templates(e.g. Apple Prores), please ensure that your computer has Final Cut Pro installed, otherwise the converted files will have audio only without image.
2.If you are using FCP X, please make sure you have installed ProApps QuickTime Codecs, or you may get files with sound only without video.
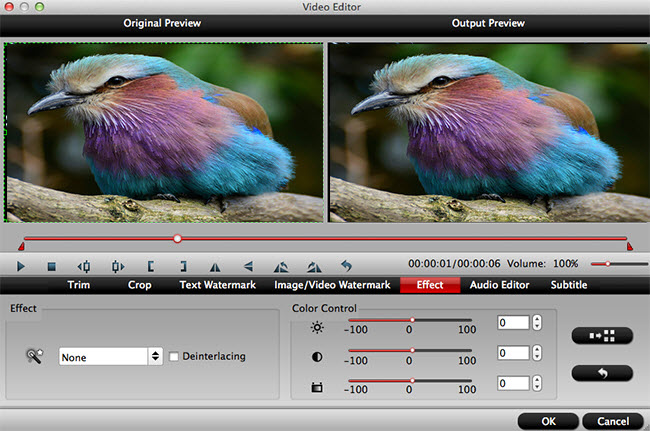
Step 3: Customize output video and audio settings.
Open “Profile Settings” window to adjust output video and audio parameter settings according to your own preference. For smooth workflow of Red One camcorder recorded 4K RAW files with NLE programs, you are recommended to downscale 4K video to 1080p from “Size(pix)” drop-down selection.

Step 4: Start the conversion process.
After all the setting is over, go back to the main interface and hit right-bottom “Convert” button to start Red One camcorder recorded 4K RAW files to FCP conversion process.
When the conversion is completed, following the guides below to import Red One camcorder recorded 4K RAW files to FCP individually.
Read More:
- 2015 Best Mac Video Converters Review: Top 5 4K Video Converter for Mac
- Edit Lewis Hamilton Crowned 2015 FIA Formula One Videos in FCP X
- Edit Sony RX1R II Record XAVC S Videos with FCP X on Mac El Capitan
- Samsung NX500 H.265 4K to FCP X Workflow on Mac El Capitan
- Halloween Theme videos/songs in FCP/iMovie for furthering edit


Recent Comments