

Summary: By the article, you will learn the easiest way to import and edit Panasonic AG-HVX200 P2 MXF recording with iMovie flawlessly on Mac Mountain Lion 10.8 by transcoding Panasonic P2 MXF to iMovie campatible codec “Apple Intermediate Codec (AIC) MOV”.
Q: One of my clients just bought a used Panasonic P2 camera, a AG-HVX200, and wants to edit P2 MXF footage (720p 24p) in iMovie 11 and Mac Mountain Lion 10.8.
I’m looking for an simple, reliable, reasonably priced converter so they can take their Panasonic P2 MXF footage and prep it for iMovie 11.
I am seeing a number of products on the market that do this, but I’m not sure which one I should purchase.
Do you guys have something suitable for this task?
Stephen
A: Apple Intermediate Codec is iMovie preferred video. That is to say, AIC videos will show you a better performance when you import and edit them in iMoive. So you’d better to choose a program which can export AIC videos. My brother is a photographer and he owns a Canon XF100. The program he uses is a MXF Converter for Mac made by PavTube (it seems to be this name). He usually exports Apple ProRes video for further editing in FCP. I have tested this program and noticed that it also has AIC output. Please google PavTube MXF Converter for Mac and check if it is helpful.
Pavtube MXF Converter for Mac is entitled as a top P2 MXF to iMovie Converter. It supports encoding Panasonic P2 and Canon C300/XF105/XF100/XF300 MXF files to iMovie native format so that you can easily import Panasonic P2 camera recording MXF to iMovie 8/9/11 for editing on Mac Mountain Lion 10.8. This will help you import the file correctly and saving the rendering time.
Required software:
1. Free Download P2 MXF to iMovie Converter for Mac

2. Supported OS: Mac OS X Leopard (10.5), Snow Leopard (10.6), Lion (10.7), Mountain Lion (10.8)
Below, I will offer a quick tutorial up on how to transcode Panasonic AG-HVX200 P2 to AIC MOV for editing on iMovie 8/9/11 smoothly on Mac Mountain Lion 10.8.
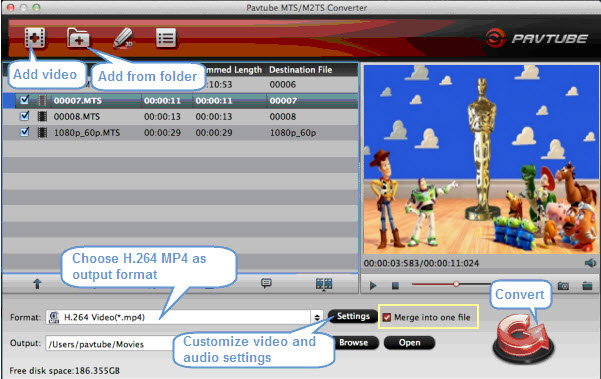
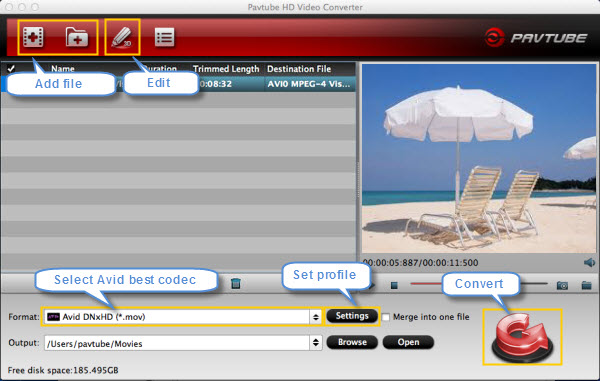
Step 1. Load P2 MXF footage from Panasonic AG-HVX200 to Pavtube P2 MXF to iMovie Converter for Mac.
Install and run P2 MXF to iMovie Converter for Mac, load your P2 MXF files into the program.
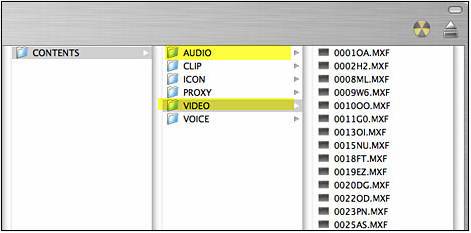
MXF file structure on Panasonic’s P2 card
Note:
If you are loading Panasonic P2 MXF files to Pavtube MXF converter for Mac to Final Cut Express to do format conversion, please make sure you have the entire MXF file structure as it saved on your camcorder’s P2 card. As the above screenshot of MXF file structure on Panasonic’s P2 card showing, .MXF clips are all saved in ‘VIDEO’ folder, while audio files are all stored in ‘AUDIO’ folder, so if you only have some loose .MXF clips, your files will have image only without audio.
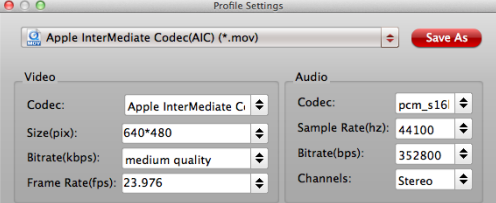
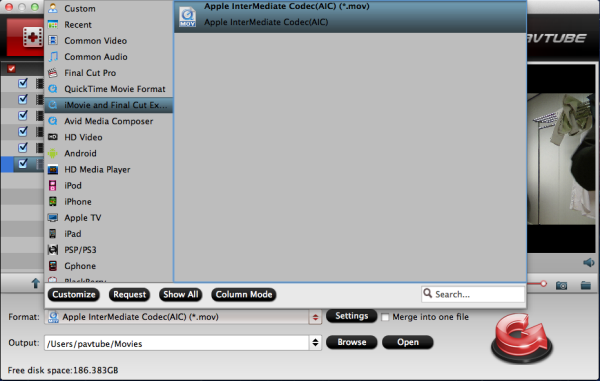
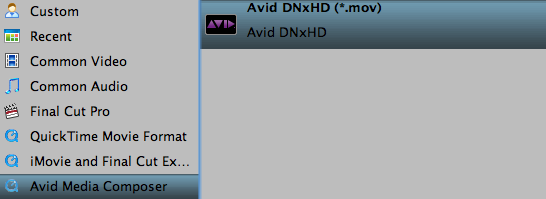
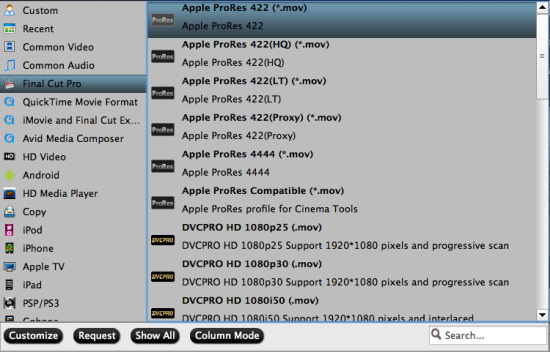
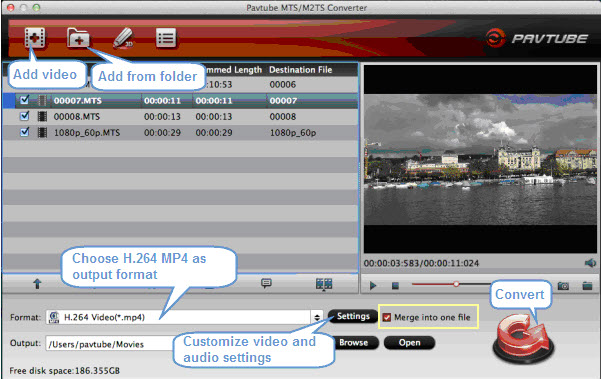
Step 2. Select AIC MOV as the output format for iMovie 8/9/11 and set the output folder.
Click “Format”, and move mouse pointer to “iMovie and Final Cut Express”, from the sublist, you can easily find the “Apple Intermediate Codec(AIC) (*.mov)” which is the compatible format for you to import Panasonic AG-HVX200 P2 MXF to iMovie 8/9/11 for further editing on Mac Mountain Lion 10.8.

Step 3. Click “Convert” button in the main interface to start convert Panasonic AG-HVX200 P2 MXF to AIC MOV for iMovie 8/9/11 editing on Mac Mountain Lion 10.8.
Some more helpful features of the Panasonic P2 MXF to iMovie Converter for Mac:
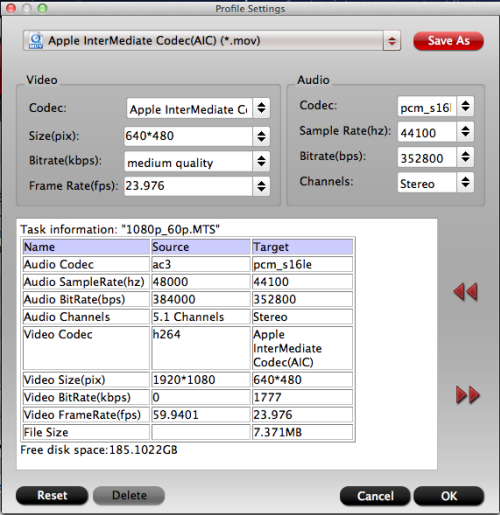
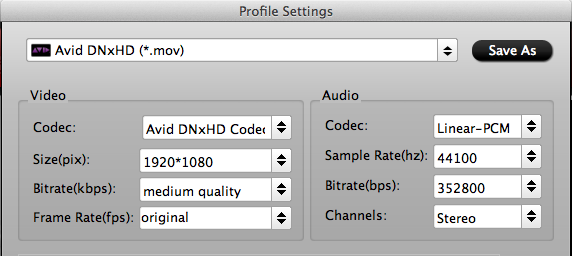
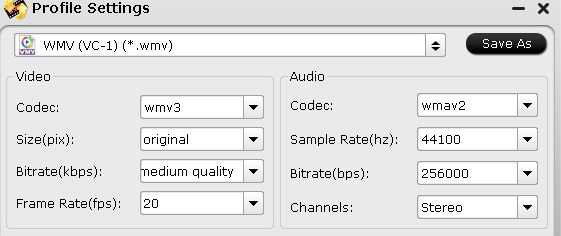
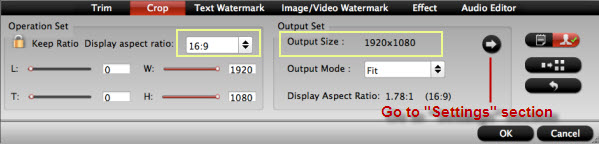
1. Settings – click to set video resolution (1920×1080/1440×1080/1280×720/720×480), bitrate(from 1Mbps to 20Mbps), frame rate (24p/30p).
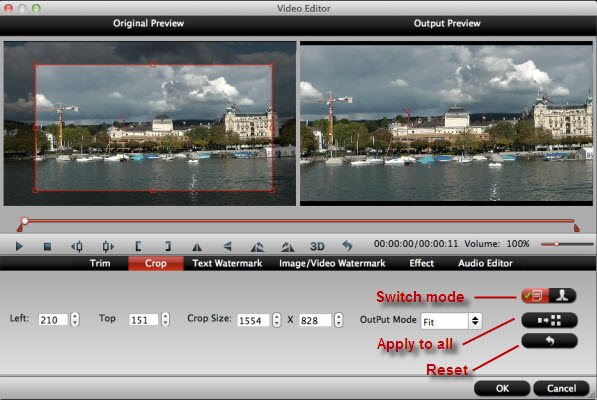
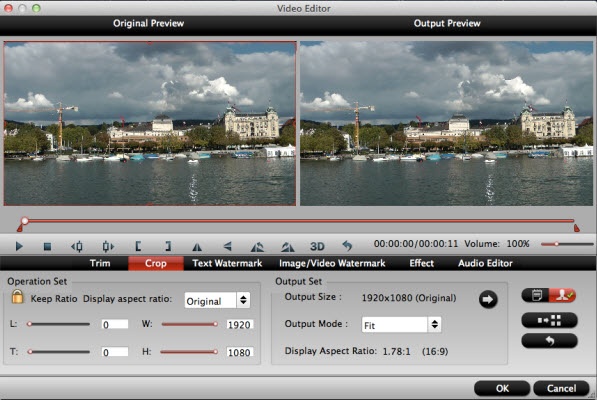
2. Editor – click “ ” bar to set effect, deinterlace, denoise, mute, volume up, trim, crop etc.
As a 2012 professional P2 MXF to iMovie Converter for Mac, it also supports transcoding P2 MXF to Apple ProRes Codec for editing with Final Cut Pro 6/7 and FCP X.


 ” and get the imported videos cropped, trimmed, flipped, added effect as you want and deinterlace 720i AVCHD or AVI in the Effect.


 ” to set start point, and click the right square bracket “
 ” to set end point when previewing the video.
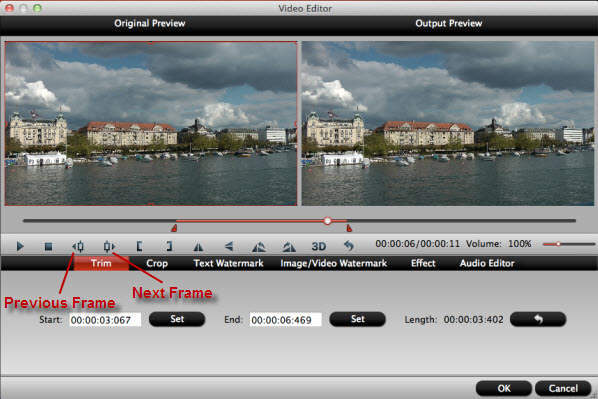


Recent Comments