

Have downloaded a lot of FLV videos from website such as YouTube and want to transfer them to Avid Media Composer for editing? When you do it, you may come across this problem:
“I am trying to import FLV files into Avid Media Composer, but the program can’t directly ingest the file. Should I find a way to convert them into something that Avid Media Composer is happy with?”
Flash Video FLV files usually contain material encoded with codecs following the Sorenson Spark or VP6 video compression formats, but it seems that Avid Media Composer does not like the way.
FLV usually contain material encoded with codecs following the Sorenson Spark or VP6 video compression formats. It can hold many different type of audio, video codec such as H.264, H.263, MPEG-4 ASP, MPEG AAC, etc.FLV also contains information such as duration, width and height, framerate, encryption, metadata…
If there are some video, audio or other information in FLV container that does not one hundred percent compatible with Avid Media Composer, you will easily encounter import issues, freezes or goes super super slow. On this occasion, to get Avid Media Composer work perfectly with FLV videos, the easy and quick workaround is to convert FLV videos to Avid DNxHD MOV, which ensures maximum editing quality and efficiency when working with Avid. [Perfer to Avid best support format.]
If you are running on Windows, you can turn to equivalent version Pavtube Video Converter, which is an easy-to-use yet FLV converter, player and editor as well as Mac version.
It supports to convert video files in a wide range of video formats, including TiVo, HEVC/H.265, AVI, Xvid, DivX, H.264, MP4, 3GP, MKV, WMV, RM, FLV, MOV, WTV, MXF, MVI, F4V, Apple ProRes MOV, WebM, VP8, 720p, 1080p, 1080i HD,AVCHD videos and more.
That is to say, it can transcode all the files (absolutely FLV included) into another target format(Avid DNxHD MOV) with high quality.
Besides Avid Media Composer, this program can help you convert then import FLV video to Final Cut Pro, iMovie, FCE,Premiere, Pinnacle Studio,Davinci Resolve, QuickTime, Windows Media Player, iTunes and other editing applications.
The trail-before-purchase is supported, just feel free to try it, it is 100% clean and safe:


How to Convert FLV Files to DNxHD for Avid Media Composer
Download and install Pavtube Video Converter on Mac/PC (compatible with Mac OS X 10.11 El Capitan, 10.10 Yosemite, 10.9 Mavericks, 10.8 Mountain Lion, 10.7 Lion, 10.6 Snow Leopard, 10.5 Leopard and lower versions, and Windows 10, Windows 8, Windows 7, Windows XP, Windows Vista, and Windows 2000).
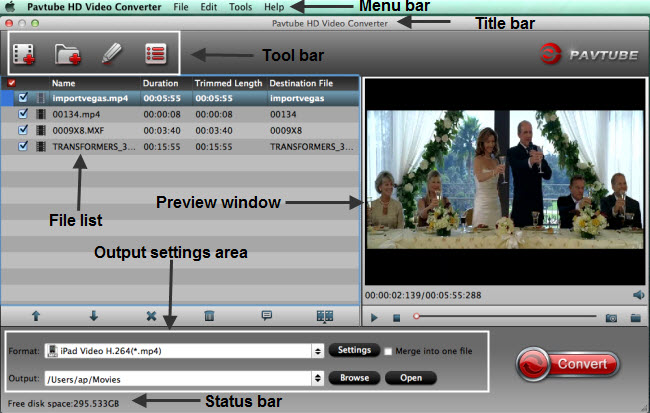
Run this program, you will find the interface is very brief, this program is very easy to use. We choose the Mac version as example, Windows version has the same step except the litter difference in program interface.
Step 1. Add FLV files
Click “Add Video” button to load MP4 files to the program. You can also directly drag the video files into the program directly.

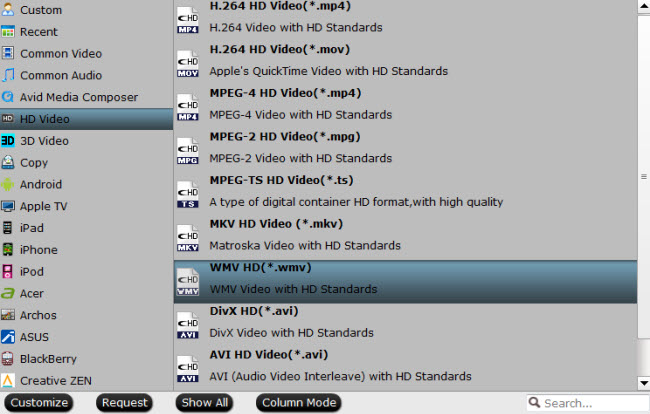
Step 2. Select output format
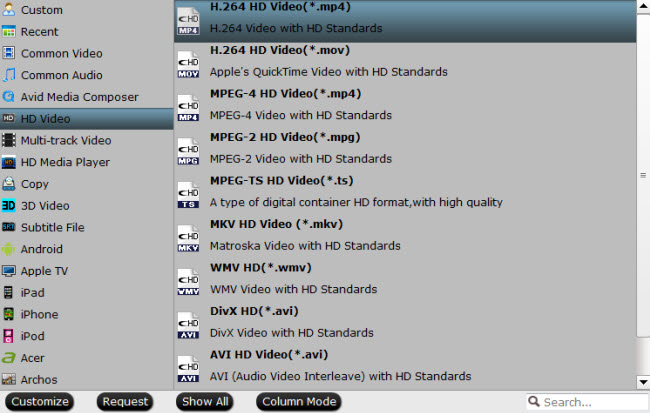
From “Format” drop-down lists, you can select Avid Media Composer preferable editing codec from “Avid Media Composer” > “Avid DNxHD(*.mov)” as the output format.

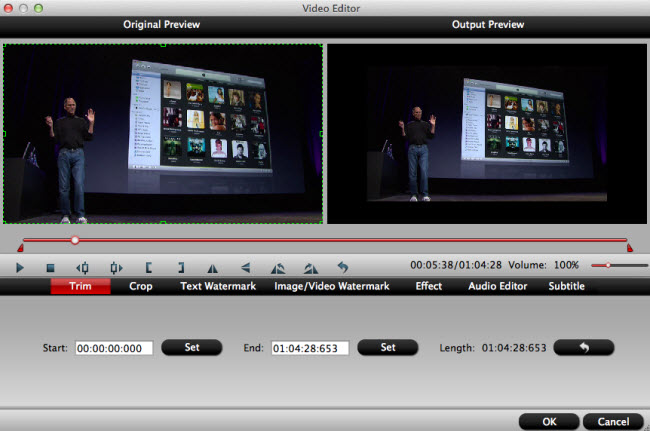
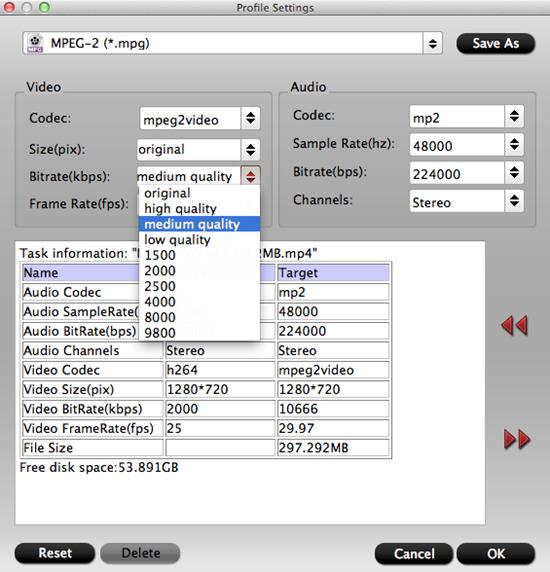
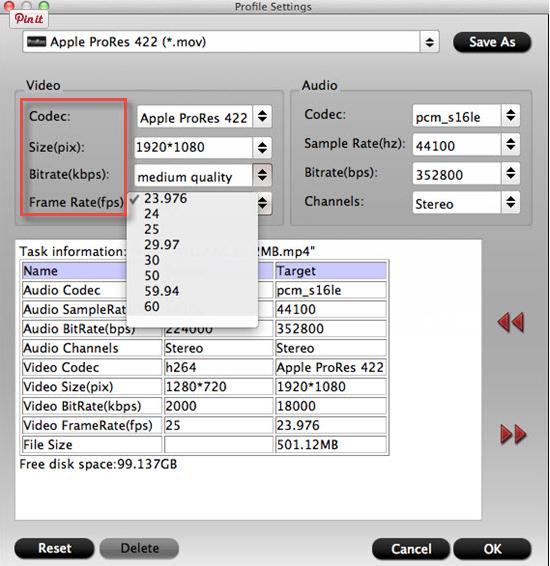
Tip: If you like, adjust video and audio parameters, including the Bitrate of Video and Audio, the Codec of Video and Audio, Video Size, Sample Rate, Frame Rate, Audio Channels, etc., by clicking the Settings button on the main interface for getting the best quality.

Step 3. Start the conversion
Finally, simply hig the big Convert button to start converting FLV to Avid Media Composer friendly video formats.
Within several minutes, you can find the converted file on your computer by clicking the “Open” button. And then you can import the converted files to Avid Media Composer easily.
Related program:
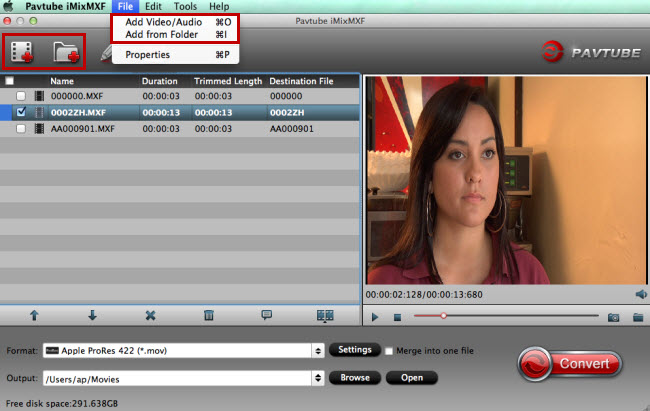
If you have the camera recorded video in MXF, AVCHD(MTS/M2TS) container or codecs, the list best two MXF Converter / MTS/M2TS Converter should be take into your consideration!
Pavtube MXF Converter / Mac Version: can handle MXF/MXF footage produced by Canon, Sony and Panasonic camcorders and convert MXF video files to various video format supported by popular devices such as iPad Air/4/3, iPhone 5S/5C/5/4S/4, Apple TV 3, Google Nexus, Samsung Galaxy Tab S/3/2, Samsung Galaxy S5/S4/S3, Surface RT/Pro, PS4/PS3, WDTV, etc. >> Convert Panasonic P2 MXF Files to Avid Media Composer
Pavtube MTS/M2TS Converter / Mac Version:The best AVCHD(MTS/M2TS) converter on the market, which can convert AVCHD(MTS/M2TS) videos and other HD formats to FCP X Apple ProRes codec MOV format, or convert AVCHD(MTS/M2TS) to Avid Media Composer/Adobe Premiere Pro/iMovie native supported video format. >> How to get Avid Media Composer working with AVCHD MTS footage?
Read More:
- Import Samsung NX500 H.265 to Avid on Mac
- Edit Panasonic DMC-GH4R 4K in Avid Media Composer
- Import Sony XAVC file to Avid Media Composer on Mac
- Sony F55/F5 XAVC 4K videos and Avid Media Composer
- Load Sony XAVC L MXF to Avid Media Composer


Recent Comments